Woody & Ted: "Ted the Plumber"
Posted: Monday April 10th, 2006
by
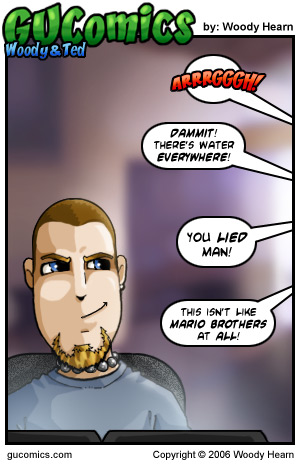
You guys know my track record with bathrooms. Well this new place was the bathroom from hell revisited. Last time it was the floor. This time it was the walls.
We moved into this house because we loved the layout, it's location, most of the interior design, etc. But one thing stuck out in stark contrast to our design sensibilities: dated, 70's flower covered wallpaper.
Now, I hate wallpaper on a general level, so I knew it had to come down. Luckily Taks was in complete agreement. The wall paper exists in three locations. The masterbath, the entry way, and the small guest bathroom. We decided we'd start with the guest bathroom since it was so small. You know... just incase there were any problems. (I've learned my lesson from previous batroom experiences.) And I prepared myself because wallpaper in a bathroom is a stupid idea in the first place: shower = steam = moisture = not a friend to wallpaper. Now, this should have been a $40-$50 fix tops: wallpaper enzyme-based stripper, a little spackle, a little primer and some paint. Things didn't quite work out that way. I've now spent in the hundreds.
Because the moisture from the shower had already caused the wallpaper to start peeling at the seams, we decided to go with a steamer first. This didn't go very well. The wallpaper just didn't want to release. We found out why on our next attempt.
Steamer rental, gloves and eye protection purchased -$68
So we moved to the enzyme-based stripper, I mentioned initially. When we started stripping the wallpaper, we noticed it was doing considerable damage to the wall itself, and not because the chemical hadn't done it's job. No... the contractors that built the house put the wallpaper up directly on the drywall without putting down primer. THIS is one of the single most stupid things I have ever seen. For wallpaper stripper to do its job it has to soak through the wallpaper to get the glue to release. With no primer on the drywall, the stripper goes straight through to drywall paper itself. So, to take down the wallpaper, we'd pretty much have to destroy the wall surface.
Enzyme based stripper, scoring tool, scrapper, atomizer, brushes, rubber gloves - $46
So, I've never had to deal with this problem before. I've never encountered something this collosally stupid. Luckily Taks' dad is a general contractor himself and he gave us some helpful idea on how to deal with the situation. We also got some "helpful" advice from the folks at Home Depot. Please note that helpful is in quotations. That is indicative of the advice not being helpfull at all.
We went ahead and stripped the wallpaper. Damaging the wall was unavoidable. Interestingly enough our sander burnt out while sanding the roughest sections of the walls so we had to buy a new one. **sighs** We bought a Ryobi handheld, cordless, orbital. (I love that thing) Thank goodness we'd just bought that extension cord so we could reach all the walls with the old corded sander though huh?
Extension cord, new sander - $49
That being done, we bought the tools to lightly coat the damaged walls with joint compound, smooth them flat, seal them, prime them, paint them... done. Well, because the paper surface was pretty much gone, the moisture from the joint compound made the the hidden part of the wall we tested on bubble up. Thanks for suggesting joint compound Mr. Home Depot man.
Trowel, mud pan, 2 tubs of joint compound and 1 lost receipt - $42
So Taks' dad (remember, general contractor) suggested we try topping compound. It's used for doing textured surfaces for walls. It has less moisture in it and it's a finer material. Gotta seal the walls first though; so, a Home Depot guy suggested a Drywall specific primer. Well, it wasn't water proof despite his assurances, it bubbled up. Since we'd already primed the whole bathroom with it... there was no taking it back. So, we had to get a different primer, hooray. We were a bit more cautious this time around, found a more qualified Home Depot guy and bought something called Shieldz.
Mortar Trowel, mortar pallet, Topping compound, PVA Drywall primer, Shieldz - $54
Ultimately the topping compoud did still bubble up in a couple of places, but it smoothed out as it dried. Nice. We did realize during the process that getting the walls smooth was going to be exceedingly difficult, so we decided to apply a texture. Taks did a great job with that while I was working on GU projects. So we were ready to paint. We found the colors we wanted, and for the sake of consistancy, bought the paint from the folks whose color swatches we'd picked up: Behr. We bought semi-gloss because it's a bathroom and needs to be pretty water resistant. Well, Behr Semi-gloss is incredibly latexy, so with the sealing might of the Shieldz, the paint kinda sits on the surface and is fairly easy to nick and damage. **sighs**.
Alrighty, so paint prep... brush for corners, detail brushes for ceiling line touch up, paint trays, painters tape and to work with the texture we bought some medium knap rollers. Despite their "quality" rating, they shed on our wall. So, we had to buy some more medium knap rollers.
Base paint color 1 gallon, accent wall color 1 pint, paint tray, disposable paint tray liners, painter's tape, brushes, rollers - $50
Now, if you recall, I mentioned the paint can be somewhat easy to nick and damage. Well, we found that out when the painters tape, despite scoring, pulled up bits of the paint. Little bit of extra touch up, but in order to be safe, it would still be best to caulk the ceiling line, around all fixtures, etc.
Caulk gun, paintable water resistant caulk - $16
Now with the main ordeal of the wall done, you've got the finishing touches. We had to remove the light switches because they had been painted over. We had to replace the switch cover because it had been wallpapered. We replaced the main lighting feature because it was hideous and dated. We also replaced the toilet paper holder because it was this monsterous thing set into the wall (removing it left a huge hole in the wall, we fixed that before doing the texture). And, out of sheer vanity we replaced the flush handle on the toilet so it matched our new lights and toilet paper holder.
Light fixture, toilet paper holder, light switches, switch cover, flush handle - $250
Total: $325
Total + finishing touches: $575
Man I love bathrooms.
**collapses**
Needless to say, just because you can trust one Home Depot without question doesn't mean you can trust another one without question. And never trust a house that you didn't construct (or oversee construction) yourself to have been handled properly. Wallpaper directly on unprimed drywall... idiots.
[ discuss ]
[ top ]
- advertise on gu -


